Variable Openmod Part 2 Assembly
Part 2?
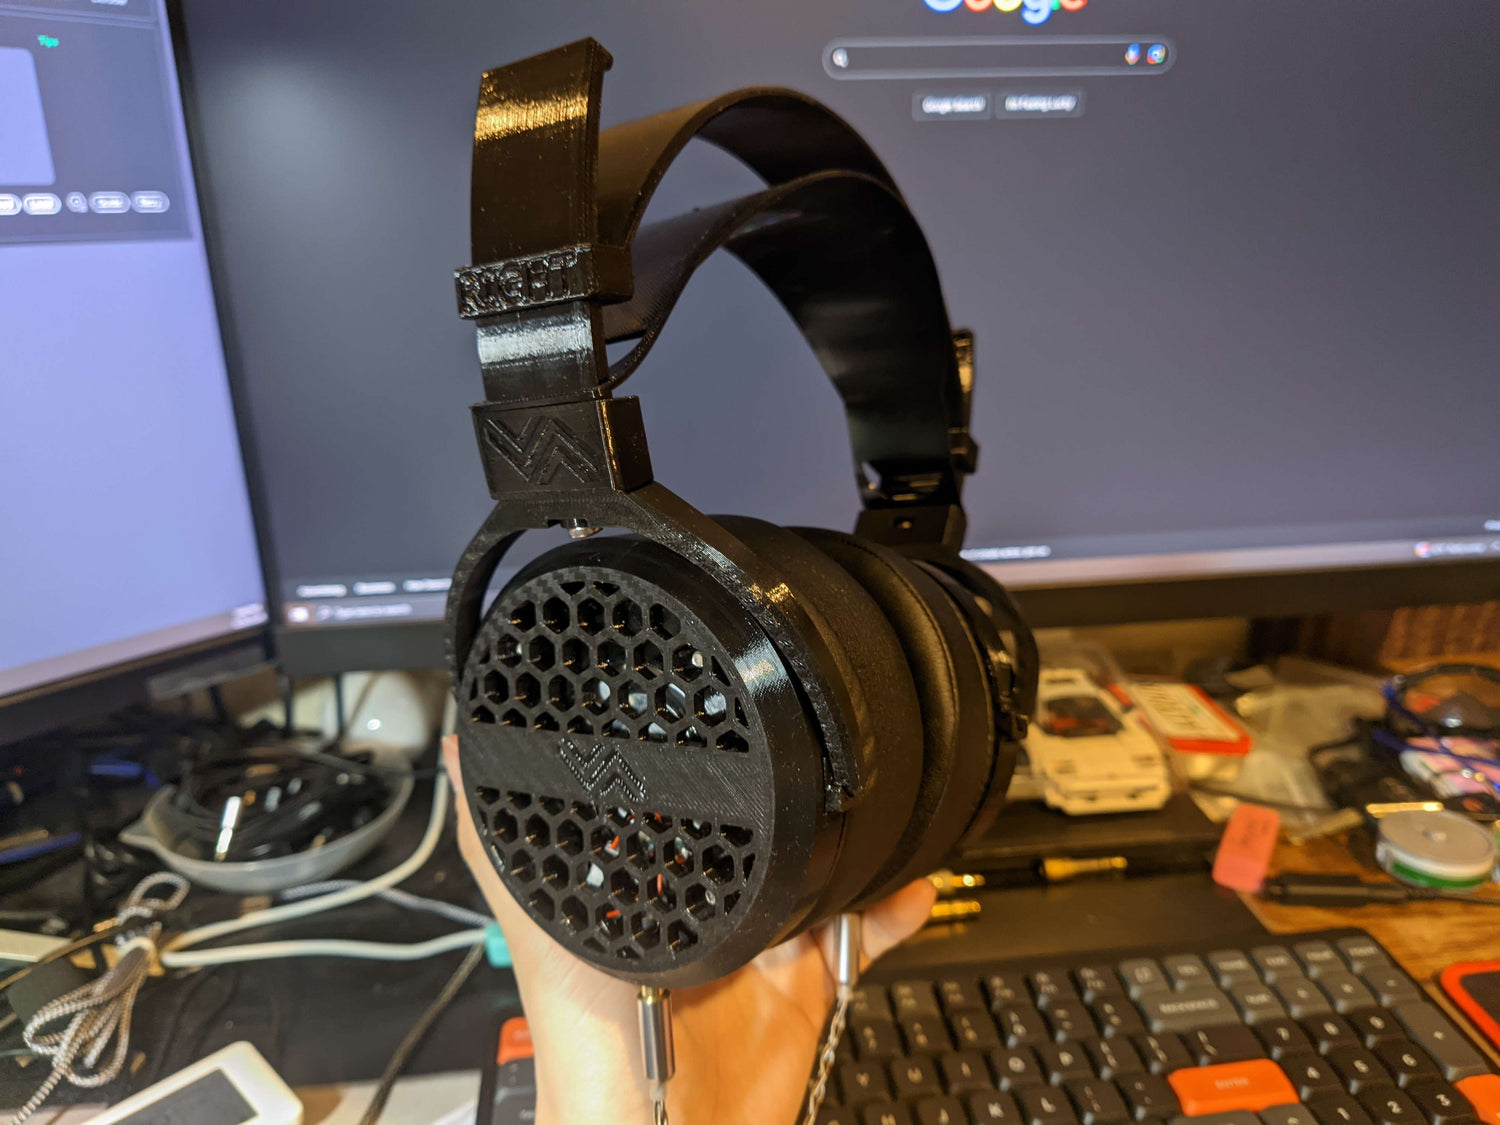
Variable Openmod Part 2 consists of circular earcups capable of 40-70mm dynamic drivers and an adjustable sliding headband.
The instructions for Variable Part 2 won't be as indepth as Part 1 due to it having the exact same design principles. Please refer to Part 1 for a more detailed assembly process of the earcups.
The instructions here will only highlight the installation of the MDR-XB1000 earpads along with the assembly process for the new headband.
Keep in mind that the 70mm drivers have a specially made parts for it that are not compatible with other 40-60mm parts due to how big it is.
-

If you have purchased the speaker box and need instructions on disassembling it press here:
-

Be careful to NOT touch the driver diaphragm. It can permanently damage the drivers.
-

The size of the drivers that the pad mount is compatible with are located on the bottom of the pad mount.
The 70mm parts are not compatible with any other parts so they don't say what size they are.
-

-

There are different types of parts. Each picture shows a single earcup. Complexity and part selection is all up to you.
You can go with a more customizable two piece shell or a single shell. Or perhaps use the standard 100mm circular earpads or the more complex and massive MDR-XB1000 pads.
-

Example of using different filament colors for the shell. And showing what the closed back looks like.
-

All the nonprinted parts used:
- 10x: M4x20mm Panhead Phillips Screw
- 10x: M4 Hex Nuts (DIN934)
- 2x: PJ392 3.5mm Socket
- 2x: Dynamic drivers
- 2x: Pair JST PH 2pin wiring
- Compatible with most dynamic driver sizes: 40, 42, 44, 45, 50, 52, 60, 70mm
-

2x: 100mm circular earpads or MDR-XB1000 earpads
1x: 2x 3.5mm male to 3.5mm male cable
The cable is the same kind of cable as used by Hifiman headphones like the Arya.


Circular Earcups with MDR-XB1000 earpads assembly process.
-

First start with the middle body and the 3.5mm socket.
-

Insert the socket and screw it in via the knurled nut.
-

Optional:
If you're unsure whether or not the socket is tight enough, use some pliers. Make sure to not tighten it too much or else you could damage the socket.
-

Next grab the drivers and the middle body.
-

Next flip everything over and put the driver in the middle with the diaphragm or if it has a grill like in the picture, facing upwards.
-

Next take the spacer for the MDR-XB1000 pad mount.
-

Place the spacer on top of the middle body and driver. It should just slot right into the middle body unless you have a very tall driver. It should not be able to rotate if you have assembled it correctly.
-

Next take the XB1000 pad mount itself along with 4 screws. If your driver does not come with a grill, then you will need a XB1000 pad mount with a grill.
-

Next place the XB1000 pad mount on the assembly along with the screws.
-

Next, flip the entire thing over. If it is too difficult due to all the screws falling out, you can just use 2 screws to hold everything together.
-

Connect the wires.
-

Next grab the shell. Note that the 70mm driver's shell doesn't have a 2 piece shell design. And of course, if you don't want to use a two piece shell design, you can always just use the single piece design. Especially when the assembly process is a bit difficult already.
-

Place the first part of the shell on the assembly. It can only fit one way.
-

Next, grab the second part for the shell whether it be open or closed back.
-

Place the second piece on. Make sure to orient it horizontally as seen in the picture. Though I suppose if you really wanted to, you can orient it to vertically.
-

Now grab 4 hexnuts.
-

Place the 4 hexnuts into the right places. You will know. Then screw it all in from the bottom.
-

Now grab your XB1000 earpads and the XB1000 ring.
-

Place the ring within the earpads like in the picture with the flat part facing upwards.
-

Push the earpads into the assembled earcup with ring closest to the earcup. Then press the earpads, feeling the ring and press it into the clips. You will feel and hear a "click" once it goes together. You should also check to feel the ring being flush against the chassis.
-

As seen in the picture, the ring is flush with the clips.
-

Now you have assembled and installed XB1000 earpads! To remove the earpads, just remove them like you would for any other earpad. Firmly pull it off. The ring can also just be removed and put back in when you want to replace the earpads.


Headband Assembly
-

The parts for the headband.
-

Start with the main arc and a secondary arc.
-

Insert the secondary arc.
-

Next grab the suspension pad.
-

Slide the suspension pad onto the secondary arc.
-

Next grab the clip.
-

Just slide the clip onto the secondary arc. Next you'll need to grab a hex nut.
-

Insert the hex nut.
-

Next, grab the yoke of your choice whether it be the oval yoke from Part 1 or the circular yoke from Part 2. And also a screw and screw holder.
-

Put all the pieces together.
-

Repeat for the other side and you're done!


Standard Part assembly?
-
As for the more standard parts, just use the Variable Openmod Part 1 assembly instructions. The design is essentially the same but with circular parts. This also includes the 52mm adapter parts which are are used in Part 1 that are also compatible for Part 2.
Part 1 and 2 use interchangeable headbands and some parts such as the 52mm adapter.